Using Houdini’s Fluid shelf tool various levels of viscosity is being tested.
Particle separation : 0.1
Particle advection CFL : 0.75
Author: tulsi
Voronoi fracture using Houdini
So, looks like I’m in love with Houdini, as I am spending a lot of effort on Houdini projects. I took up some tutorials on digital tutors and learnt the art of fracturing in Houdini.
Off the shelf tools are so handy to use if you want to create a scene with a simple breakable object but there’s a lot more for us to learn about the fracture dynamics building blocks.
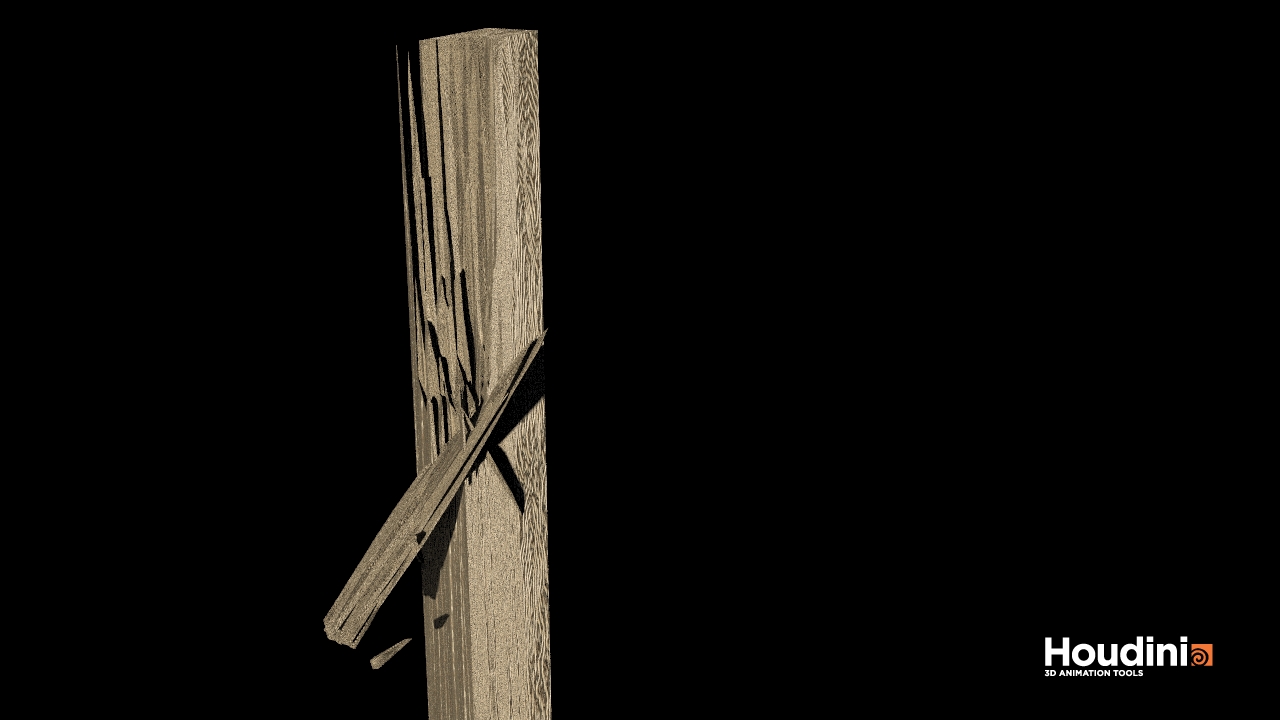
So I used a box geometry with wood material. The fracture parts are amde to looks long and sharp by adding a transform node after the fracture node. So the pieces are scaled along the y axis to look more realistic as like wooden shards.
Here’s the screenshot of my Box SOP network

The voronoi fracture points node is especially useful to create desired fracture points input from the scatter node.
For the rendering I have used environment light and a sampling quality of 20.
Glass Shader using Houdini
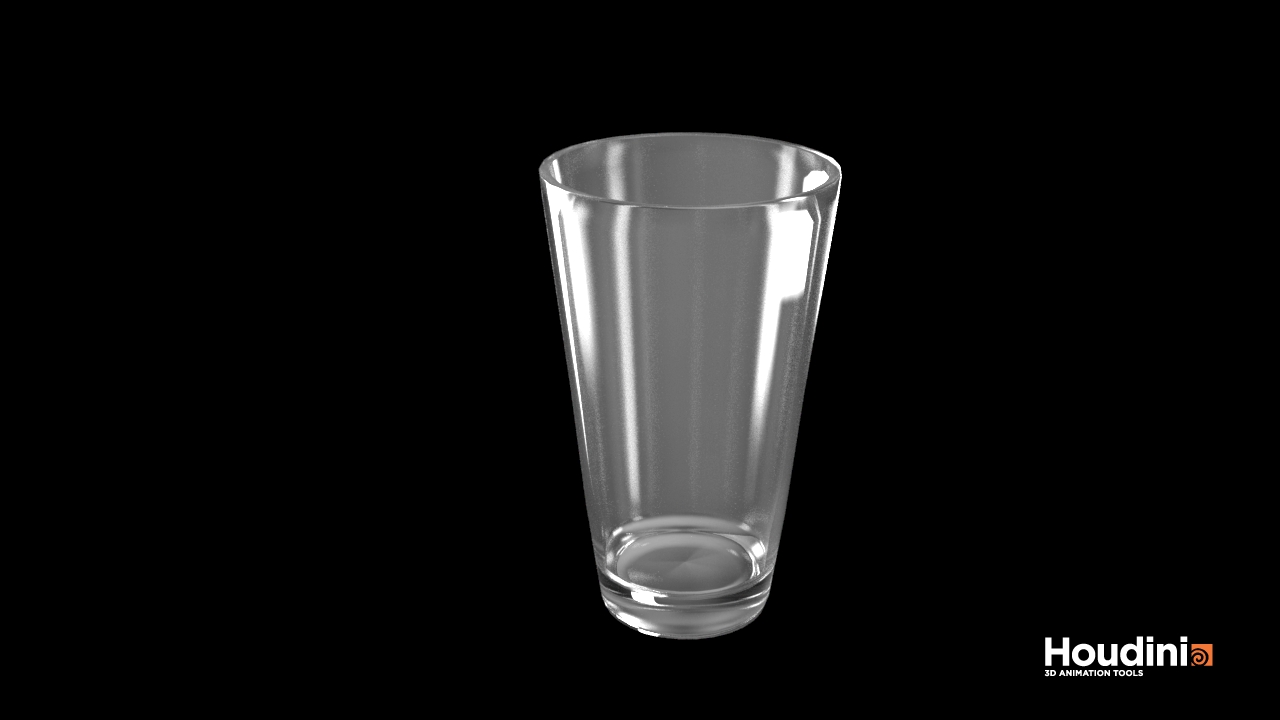
So this is my first glass shader in houdini. The glass cup has outer and inner structure with refraction in air settings. The rendering mode is PBR with a higher sampling value to get a good look!
How to add texture in Houdini
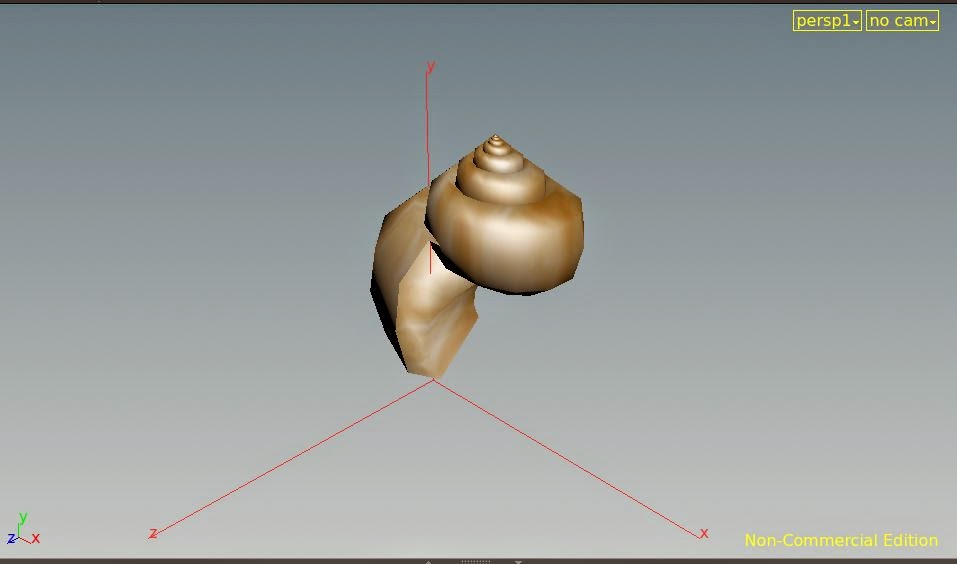
One of my school assignments was to model sea shells in Houdini and then apply realistic textures to them. So I hadn’t decided on the procedure to go ahead with (Not that I knew how to do it then). I searched around the internet a lot for weeks trying to find out how to import an image to a material in Houdini. There were many tutorials on building your own custom Shaders (which I will be covering in my next post) but I had a tough time finding how to import an image.

I poked around Houdini and found out it wasn’t all that bad. So all you need is:
1. Image editor (Photoshop preferably) to create a .TIFF image.
2. Houdini (I have the apprentice version)
You can download my files from here
1. To create the .tiff file
Step 1:
In Photoshop create a new canvas. I have used 7×5 inch document size.
Step 2:
Set your background color to the preferred shell color and foreground color to white. I have used #eab963. Next step we will render clouds.
Step 3:
Go to Filters->Render->Clouds (Use the default settings). You should get something like this.

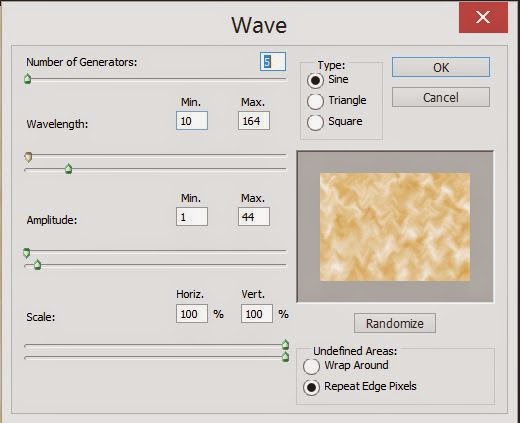
Step4:
Go to Filter->Distort->Wave and use these settings
Step 5: Save the image as .tiff file.
We are going to use this .tiff file format to import into Houdini’s Mplay and then export the image as as .rat file (Random Access Texture) to be used as a material.
2. To do that
Step 1:
Open Houdini and under the Render menu choose Mplay->Load Disk Files. Load your .tiff file (the one that you created using photoshop)

Step 2:
Choose File->Save Frame As.
Under the File format choose Random Access Texture and save your file as a .rat file.
3. To apply the texture to your model
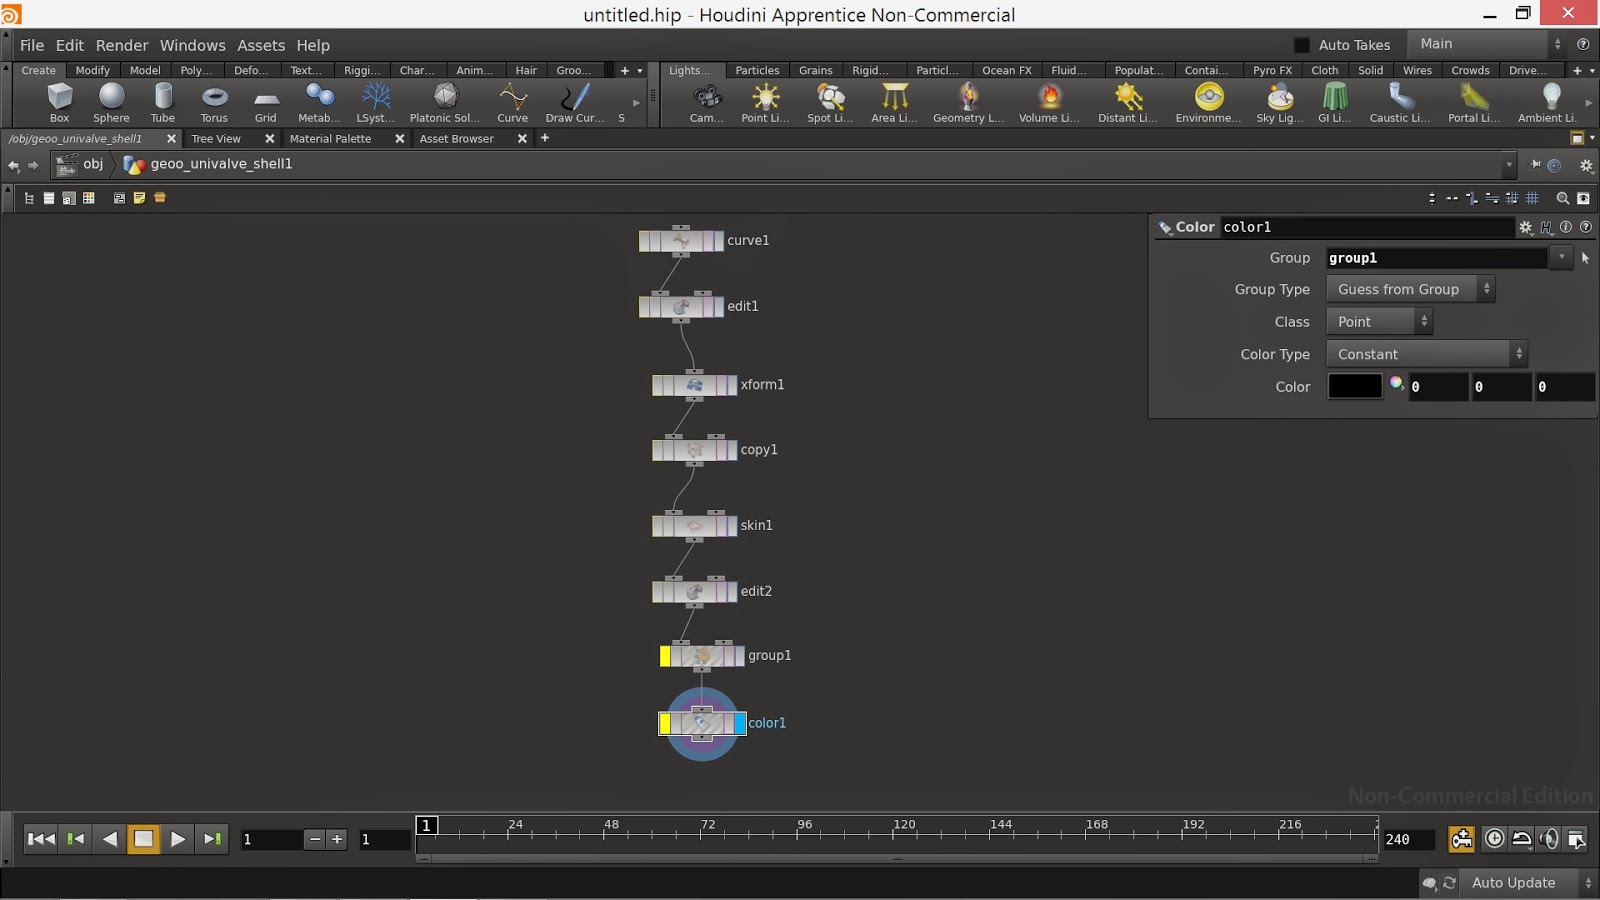
Step 1: Open your .hip file with the desired model or you can use my seashell file.
This is how my geometry looks like in object level.
Step 2:
Add a UV Texture node from the tab menu and connect to the last node of your model.
Houdini reads image coordinates as UV coordinates like xyz for the geometries. So the UV Texture node assigns UV coordinates for your model so that you can apply the .rat file as your material.
Step 4:
Add a Primitive sop to the UV Texture. This node converts each polygon into a separate primitive.
Under the Primitive Parameters go to the Attributes tab and upload the .rat file that we created earlier.

Step 5:
Now go to the SHOP network and create a decal node. This node is used to apply texture on a model.

On the parameters section of the decal node, import the .rat file as your material and copy this parameter.
Go to the OGL Tab and paste copied reference parameter value.

Step 6:
Now drag the decal material to the model

Choose -> Assign Surface Shader SHOP to Material for *your model*
This is the final output!
Add other geometries and try applying new textures, even existing images from the internet.

